Monday, January 11, 2016

POOFY quilt


In one of my two favorite quilt books* there is a gorgeous Baltimore album quilt.  While I am not interested in the elaborate applique that would be necessary to do that type of quilt, I am drawn to this quilt's color scheme of green, orange, red, and yellow.  So this quilt started with an idea for a color scheme.

Then I started playing around with simple flower-like shapes.  I decided to do a quilt using a simple block of three half square triangles put together with some rectangles.


Next I put four of them together with some white and a green center.  My original plan was to make a ton of these blocks and put them together with some sashing, but I made these too large so I decided instead to make this the focal point of an otherwise very simple design.


I made a ton of green and white half square triangles and put them together to make a border.  I also added a flower for each corner.  For the center of those flowers I was going to use red, but my backing fabric had a light blue in it and no red so I decided to use blue.  I rounded the corners by tracing around a record.


The retro looking Rewind Quilt I made a while back has taken up permanent residence on our couch and, at about 60"x60", I find it's the perfect size for couch snuggling. So I made this one about that size as well.

When I was buying the backing fabric I got so excited the print I wanted was on deep sale that I didn't even realize I was buying a super stretchy jersey-like cotton instead of a quilting cotton!

Since I had an unexpectedly soft and snuggly backing fabric, I decided not to quilt this one traditionally.  Svetlana who blogs at sotakhandmade.blogpot.com made a couple of poofy comforter-like quilts that looked so comfy I knew I would do one myself eventually.  This was the time.  (Check out her Christmas duvet by clicking here.)  Basically, you layer right sides together on top of batting and stitch around the outside leaving a hole for turning, stitch up the hole, and then quilt.  No binding required.


This was my first attempt at hand quilting!  I got some thick thread that looked like an oversized skein of embroidery floss and went for it.  I feel like I could have and maybe should have quilted this more than I did, but after a while I decided enough was enough. 


It's super comfy and is so poofy it doesn't stay folded up!


* Two of my favorite books for quilt inspiration are:  
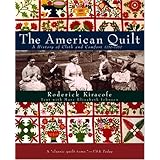
The American Quilt:  A History of Cloth and Comfort 1750-1950 
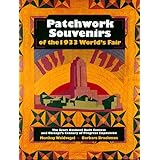
Patchwork Souvenirs of the 1933 World's Fair
Product DetailsProduct Details

Friday, January 8, 2016

Lanyards

I love this fabric and am so happy to have this cute lanyard.  Easy and super quick to pull together, this was a fun little project.  Check out this great tutorial if you'd like to make your own: 

click here for genxquilters tutorial

Beware, though--there are a lot of layers to sew together at the end!


Following the same process, I made this wristlet lanyard shorter and wider than the standard lanyard.  This one was a gift for my daughter's Cub's fan teacher.


Wednesday, October 21, 2015

Phew, this one took forever!

The T-Shirt Quilt is finally done!  
 
I didn't love making this, my first, t-shirt quilt.  In fact, I made it somewhat begrudgingly in an effort to rid these mostly-holey tees from my husband's closet.

Some of these shirts were so thin you could see through and others so thick with heavy painted-on designs. 

It is soft and snuggly though.

For the backing, I used manly buck heads.  One of the t-shirts had a line of aliens on the front and the back had the same aliens but pictured from the back.  So I transferred that idea onto the quilt.  One line of aliens on the quilt front, the other on the quilt back.


Have a great day!

Molly

ps-linking up to crazy mom quilts finish it up friday

Thursday, May 28, 2015

just Molly from the block

  
 The 
 Neighborhood 
Block 
Quilt


We are celebrating our 50th block party this summer!  I thought it would be fun to incorporate all the last names of the neighbors into a commemorative quilt.


I know it won't get much use, but I was motivated to do it anyway.


I made it 8 feet by 30 inches.
 
It could be a table runner, picnic blanket, or just a banner for decoration.
 I paper pieced the little houses and driveways using a simple design I made myself.  Since I didn't trust my own handwriting:  I picked a font, printed all the last names onto paper, and traced the names (looking through the fabric) in pencil onto the 'driveways.'  Then I embroidered the names.

The years and street name are pieced.  I wanted to just go for it and see what happened if I improvised.  I used mostly scraps from the blocks to piece them together.


Here's a look at my BASTING process:
First I spread out the backing fabric right side down.  I spread it out smooth and tape all around the perimeter.  Because this one is so long it's hanging off the back end.  I like to use the table if at all possible, but the bigger ones have to be basted on the floor.

Then I spread out the batting nice and flat.  
Next I place the quilt top on and spread it all nice and smooth. Watch the sides to be sure you're all lined up.  Then I pin away!  I use the specially-crooked safety pins and go to town, pinning all over.  Then I trim the sides an inch or two away from the quilt top and take it back to the machine for quilting.


With this one I originally wanted to heavily quilt the whole thing, but the embroidered names got in the way.  I decided to heavily quilt the middle in a free-motion/straight line/almost mazelike design.  The rest of the quilt is ditch stitched.


The backing is a black and white cross-hatch.


Thanks for stopping in and checking out my weird quilt!  Have a great day...

molly


ps-I'll be linking up with Finish it up Friday at crazymomquilts tomorrow.


Thursday, May 21, 2015

Blogger's Quilt Festival


I had such an amazing time creating this twin sized quilt for my grandmother that I just want to share it with a wider audience.  The quilt itself is nothing revolutionary in terms of design and the construction isn't as perfect as it could have been.

But for me the process of making this quilt was so very special and heartwarming.

I loved soliciting signatures by mail, learning to embroider just to do the signatures, thinking about each family member as I worked on each block, and I loved giving it to my grandmother. 

I put a lot into it and I hope you enjoy its story.  Check out the lengthy original blog post with many more pictures here.

Thanks for stopping in!

Molly

Monday, April 20, 2015

toothbrush mat


Recently we've been feeling a little crunched for counter space in the kid's bathroom.  

So we headed out & bought an Ikea shelf.  

Wouldn't you know it, that shelf top/counter space immediately looked too bare for my liking!  
 
Plus with the inevitable wetness from the toothbrushes, etc... I decided it needed a colorful mat!  

So I whipped this one out without deliberating over fabric choices.  I just grabbed, cut, slid that Juki lever up to the bunny setting, and let it rip!  


   The back fabric from Ikea and the top are kona solids.  It finishes somewhere around 17" x 15" and fits nicely on the top of the shelf.  It's the perfect spot for the toothbrush cup, toothpaste, mouthwash, cup, etc... 

It was nice to have a happy little finish.  Especially since I've been working and haven't been able to do much quilting lately. 


Thanks for stopping in!  Have a great day...  
Molly

linking up with Crazy Mom Quilts


Friday, April 3, 2015

Tooth Fairy Pillow


The time has come for my daughters to get their very own tooth fairy pillows.  I made this one for my son a long time ago and was happy to find the same pattern hanging around in the bottom of a drawer in my sewing closet.  (Not that it is an overly complicated pattern, but I've always really liked the shape of this tooth.) 

Each girl got to pick out a fabric for her pocket.  I also changed the pattern just a bit to include a ribbon, which acts as a door knob handle.  ...You know, because sometimes the tooth fairy has a hard time digging under the pillows of sleeping children and she'd like to have the option of just going to the door to deliver the goods instead.  ;)

So here's a quick little explanation of how I put these together:

1.  Cut out two teeth (a front and a back)


2. Make the pocket--two wrong sides together, stitch around three sides, turn right side out


3. Stitch the raw side of the pocket down on the tooth, iron up flat

4. Stitch pocket to tooth.  Down, across, up.  Backstitch on both sides near opening.  (Leave top open.)


5. Place wrong sides together (if adding ribbon, tuck it safely between the two right sides, leave a little bit hanging up past where you'll stitch.  that part will be flipped into the inside later.)  Stitch around, but leave a section approx 2 inches unstitched (for turning right side out).

6.  Turn right side out.

7. Stuff the pillow (I realized I was out of regular fill so I used my rotary cutter to shred some scrap quilt batting and that worked like a charm.)

8.  Pinch together the stuffing hole and sew over the top, backstitching on each end.  Or hand stitch it closed.


Thanks for stopping by!  Happy Easter, Happy Spring!

molly

linking up with Crazy Mom Quilts